You are here: Home > Amazon Irrigation > Irrigation Installation Instructions
Above Ground Irrigation
Drip Irrigation

Underground Irrigation

![]()

Irrigation Installation Instructions
Below are instructions for installing our irrigation product range:
Installation Instructions for Watering Kits
Amazon Irrigation supply a variety of Watering Kits. Using our Installation Instructions below, we guarantee you'll be delighted with your purchase as you'll have it up and running in no time at all with the minimum of fuss and effort.
Instructions for Big Dripper Watering Kit
Take 91347 and screw onto your tap or bottom of tap water timer

Run out the ½ inch main tube 90366 around your pots or shrub border. If you need to 'T' off to cover more areas, use 99071 ½ inch T supplied in the kit. Connect the main tube 90366 to 91347on your tap or timer and insert 91086 end stops to all other open ends of the main tube.
Using 99185 hole punch, make holes in the main tube where you wish to water and push a 99155 into the hole you have made.
Using the 90370 feeding tube, cut lengths required to go from the 99155 sticking out of the main tube to your desired pot, trough or tub or shrub. Insert a dripper 99225 on the end of the feeding tube and hold in place using a 99190 ¼ inch support stake.
Continue to make holes in the main tube and connect ¼ inch pipe and drippers until you have watered all your, tubs, pots or shrubs in the border.
Drippers 99225 can be connected straight into the main tube 90366 by using the hole punch 99155.
Installation Instruction for Hanging Basket Kit
Take 91345 and screw onto tap or bottom of timer.
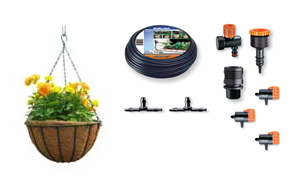
Using 90370,¼ inch feeding tube, connect to 91345 and run to first basket.
Insert 99141 ¼ inch T and run 90370 to next basket. At the last basket, run the pipe 90370 into the basket and put dripper 99209 on the end.
Now go back to each ¼ inch T and add enough pipe 90370 into your basket. Add a dripper and your system is complete.
Installation Instructions for Border Kit
Screw water timer on to tap
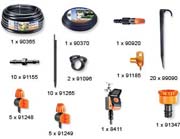
Screw 91347 on the bottom of the water timer
Take main tube, 90365, and run this out and around border or garden and hold in position with 99090 ½ inch support stake
Cut pipe to desired length and connect one end to the timer, using a 91096 tube clamp.
Take 91265, micro sprinkler support stake, and screw 91248 or 91249 adjustable sprinklers into the top and place these in the borders where best coverage is achieved
Taking 90370, ¼ inch feeding tube, cut appropriate lengths of ¼ inch feeding tube, to connect 91265 into the main tube 90365. Insert 91155, ¼ inch two-way coupling, into the end of the ¼ inch feeding tube, 90370.
Using 91185, hole punch, make a small hole in 90365, the main tube, and push the 91155, ¼ inch coupling into this hole and then into the ¼ inch feeding tube
Install a 9v battery into the water timer 8411, and your border kit is ready for action.